
A POS system implementation checklist helps you move from “we bought a new system” to “our team can confidently use it during a real business day.” That gap matters. A point of sale system is not just a checkout tool.
It affects payment processing, inventory management, employee permissions, customer data, reporting, tax settings, refunds, discounts, gift cards, loyalty programs, ecommerce integration, accounting workflows, and daily reconciliation.
A successful POS system implementation is part technology project and part operations project. The software must be configured correctly, the POS hardware must work at every checkout station, payment processing must be tested, staff must understand the workflow, and managers need reliable reporting after launch.
When any of those pieces are rushed, the result can be slow checkout lines, incorrect inventory, payment errors, missing reports, confused employees, and a poor customer experience.
This guide walks through a practical POS system implementation checklist for retailers, restaurants, ecommerce sellers, service businesses, startups, multi-location operators, and managers planning a new system.
It covers planning, POS system setup, data preparation, hardware installation, payment configuration, integrations, staff training, testing, launch support, and post-launch review.
This article is for general educational purposes. POS implementation requirements can vary by provider, business model, payment setup, hardware environment, integrations, and operational needs.
Why a POS System Implementation Checklist Matters
A POS system implementation checklist matters because a point of sale implementation touches more areas of the business than many owners expect. At first, it may seem like the project is mostly about installing a terminal, connecting a card reader, and ringing up sales.
In practice, a POS system becomes the operational center for checkout, payments, product data, inventory counts, employee access, sales reporting, customer profiles, receipts, and often online sales.
A clear POS implementation plan helps keep the project organized. It also gives each team member a shared understanding of what must happen before launch. For example, the person preparing the product catalog may need to coordinate with the person setting tax settings.
The manager assigning employee permissions may need to work with the person designing the staff training plan. The person connecting the merchant account may need to confirm that payment security, settlement, and reconciliation reports are working before the POS system launch.
Without a checklist, teams often skip important details. A retailer may import products but forget barcode scanner testing. A restaurant may build the menu but miss modifiers, taxes, tip settings, or kitchen routing.
An ecommerce seller may connect inventory but fail to check whether online and in-store stock updates properly. A service provider may configure payment processing but overlook deposits, partial payments, or recurring billing workflows.
The value of a POS system implementation checklist is not that every business follows the exact same steps. The value is that it forces you to think through the full checkout environment before customers are standing in front of your staff.
A small business POS setup may take a few days when the operation is simple. A retail POS implementation with multiple locations, thousands of SKUs, ecommerce integration, and inventory migration may need a staged rollout.
A checklist also supports better accountability. You can assign each task to a person, set deadlines, track completion, and confirm testing. That is especially helpful for businesses with managers, department leads, bookkeepers, IT support, payment processors, or outside consultants involved in the project.
Define Your Business Needs Before Choosing a POS System

Before comparing POS software, POS hardware, pricing, or integrations, define how your business actually operates. This step keeps you from choosing a system based only on features that sound useful but may not match your checkout workflow. A strong POS implementation checklist starts with business needs because every later decision depends on them.
A retailer may need barcode scanning, product variants, inventory tracking by location, purchase orders, returns, exchanges, loyalty programs, and customer purchase history. A restaurant may need table management, menu modifiers, tip prompts, kitchen display routing, split checks, online ordering, delivery workflows, and employee shift controls.
A service business may need appointment payments, invoices, deposits, tips, customer notes, and recurring transactions. An ecommerce seller may need inventory sync, online payments, shipping integrations, and centralized reporting.
Business size also matters. A single-location shop may only need one register, one receipt printer, one cash drawer, and a simple reporting dashboard.
A multi-location business may need centralized item management, location-based tax settings, manager permissions, store-level reporting, inter-store transfers, and a POS rollout checklist that supports phased deployment.
Sales volume, payment methods, and staff size should also influence your POS system setup. A high-volume checkout environment needs reliable hardware, fast payment authorization, backup internet options, and a clear troubleshooting process.
A business with many employees needs user roles, employee permissions, clock-in controls, and manager approvals. A business that accepts online payments, contactless payments, mobile payments, debit card payments, credit card processing, and digital wallets needs payment configuration that supports each channel.
Business Workflow Review
A business workflow review is the first practical step in POS system implementation. Walk through a normal sale from start to finish and document every action.
Include how a product is selected, how price is confirmed, how discounts are approved, how tax is calculated, how the customer pays, how the receipt is issued, how inventory changes, and how the sale appears in reports.
Do the same for exceptions. Review refunds, voids, exchanges, gift card redemptions, loyalty rewards, split payments, tips, manual discounts, damaged items, out-of-stock items, partial payments, deposits, and end-of-day reconciliation. These are the moments where weak POS system setup often creates confusion.
For restaurants, workflow review should include dine-in, takeout, online orders, bar tabs, table transfers, kitchen tickets, modifiers, gratuity settings, and order edits.
For service providers, it should include appointments, invoices, deposits, add-on services, no-show policies, and customer records. For ecommerce sellers, it should include online inventory, pickup orders, returns, and order status updates.
Business Type and Complexity
Implementation needs vary by business type, inventory complexity, and customer checkout experience. A boutique with seasonal collections may care most about product variants, barcode labels, returns, and inventory reporting.
A quick-service restaurant may care most about order speed, kitchen routing, menu modifiers, and tip settings. A salon may care about staff commissions, service categories, appointments, and customer history.
The number of locations also changes the POS deployment checklist. Multi-location businesses need rules for who can edit products, approve discounts, see reports, transfer inventory, and manage local settings. They also need a rollout process that prevents one location from using outdated pricing while another uses the new product catalog.
Complexity should guide your implementation timeline. If you have a small product list and one register, your POS setup checklist may be short. If you have thousands of SKUs, multiple tax categories, gift cards, loyalty data, and accounting integration, build in more time for data cleanup and testing.
Choose the Right POS Software, Hardware, and Payment Setup
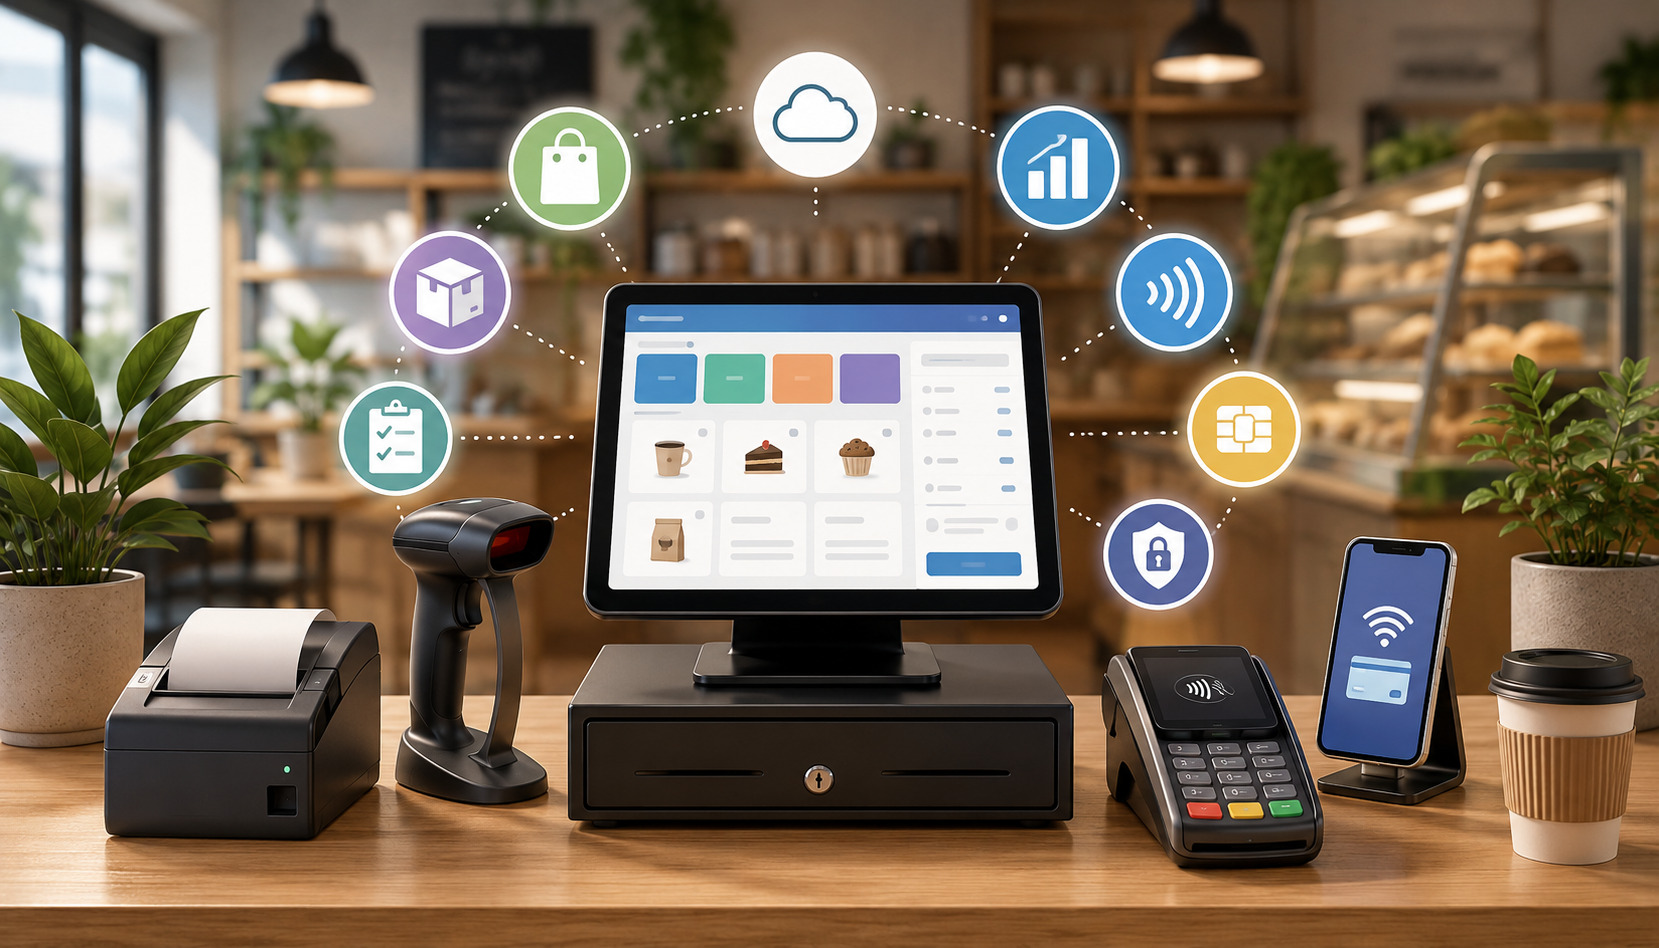
Choosing the right POS software, hardware, and payment setup is one of the most important parts of POS system implementation. The right system should support your daily workflows, not force your business into awkward workarounds. It should also be reliable enough for real checkout conditions, easy enough for staff to learn, and flexible enough to support future needs.
POS software handles the transaction workflow, product catalog, menu setup, inventory management, discounts, customer data, employee permissions, reports, and integrations. POS hardware includes terminals, tablets, barcode scanners, card readers, receipt printers, cash drawers, customer displays, kitchen printers, scales, routers, and other accessories.
Payment setup connects your POS system to credit card processing, debit card payments, contactless payments, mobile payments, digital wallets, online payments, and settlement reporting.
Cloud POS and traditional POS systems may have different implementation needs. A cloud POS typically stores data online and can support remote reporting, easier updates, and ecommerce integration.
A traditional POS may rely more heavily on local servers or onsite infrastructure. Either approach can work, but the implementation plan should account for internet reliability, backup procedures, data access, support availability, and security settings.
When comparing systems, consider how each one handles inventory migration, customer data migration, employee roles, reporting dashboards, accounting integration, ecommerce integration, and reconciliation. Also review provider documentation, support hours, hardware compatibility, payment processing options, and data export capabilities.
For additional background on common setup considerations, this guide to setting up a POS system for your business can support the planning stage.
POS Software Selection
POS software selection should begin with must-have workflows. Do not start with the longest feature list. Start with the daily tasks that must work correctly for your business to operate.
If you run a retail store, confirm that the system can manage SKUs, variants, barcodes, inventory counts, purchase orders, returns, exchanges, discounts, and sales reporting. If you run a restaurant, confirm menu modifiers, table management, order routing, tips, split checks, and kitchen workflows.
Evaluate the reporting dashboard carefully. Managers often discover after launch that their POS system records transactions but does not present information in the format they need.
Before choosing software, ask what reports are available for sales, taxes, payment reconciliation, refunds, employee performance, inventory movement, customer activity, and location performance.
Also review access controls. A good POS software implementation should let you create user roles for cashiers, servers, shift leads, managers, bookkeepers, and administrators. Employees should have only the access needed for their job. That reduces mistakes and supports better accountability.
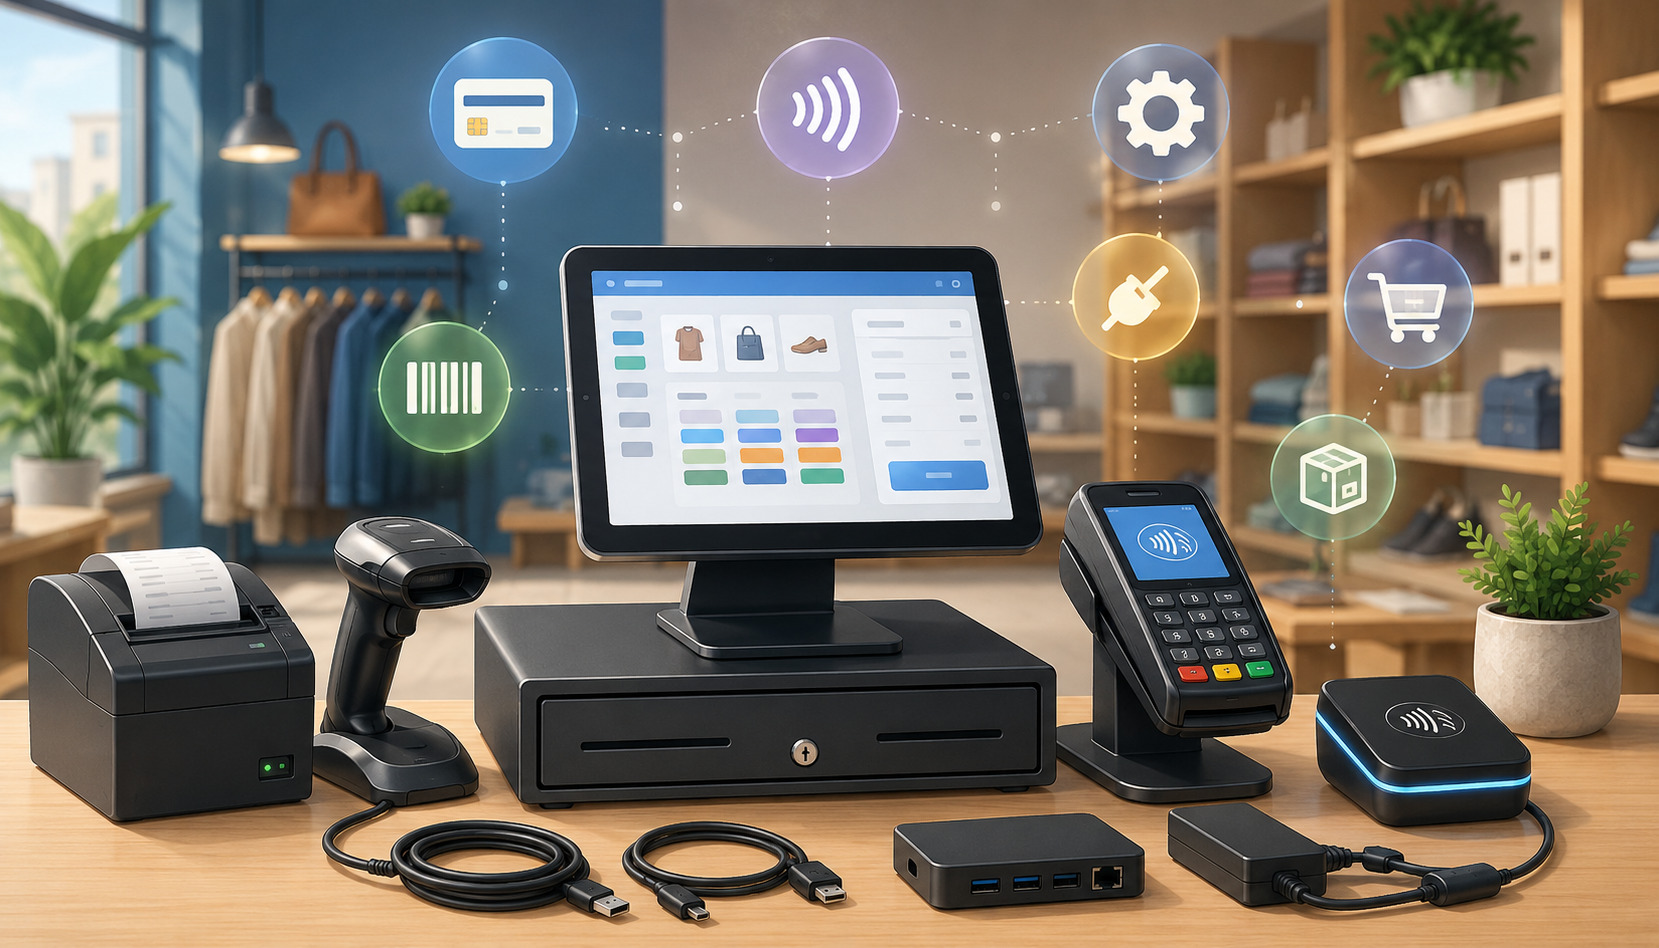
POS Hardware Checklist
Your POS hardware setup should match the physical checkout environment. A basic POS installation checklist may include a terminal or tablet, card reader, barcode scanner, receipt printer, cash drawer, customer display, label printer, network equipment, and backup power.
Restaurants may also need kitchen printers, kitchen display screens, handheld ordering devices, and guest-facing payment devices.
Check compatibility before ordering hardware. Not every receipt printer, barcode scanner, cash drawer, or card reader works with every POS software platform. Also confirm whether devices connect through USB, Bluetooth, Wi-Fi, Ethernet, or a local network. The connection type affects installation, reliability, and troubleshooting.
Think about placement. A card reader should be easy for customers to reach. A customer display should face the customer clearly. A receipt printer should be accessible to staff but protected from spills, heat, and clutter. A cash drawer should be stable, secure, and positioned for efficient checkout.
For a deeper look at common components, this overview of POS hardware essentials can help you plan the equipment side of the project.
Payment Setup Requirements
Payment setup is more than turning on card acceptance. You need to confirm the merchant account, payment gateway, card reader, debit card routing, contactless payments, digital wallets, online payments, tips, refunds, voids, settlement timing, and reconciliation reports.
If your business accepts both in-person and online payments, confirm how those channels appear in reporting.
Payment processing should be tested before launch using approved test methods or low-value transactions according to your provider’s process.
Confirm that authorizations, captures, refunds, receipts, tips, and settlement reports work as expected. If the business uses gift cards, deposits, invoices, or recurring payments, include those in the payment gateway setup review.
Security is part of payment setup as well. PCI Security Standards Council resources explain that businesses handling payment cards need to protect cardholder data and follow applicable payment security requirements.
The FTC also provides business guidance on data security practices, including access control and secure data management.
Plan Your POS Implementation Timeline
A POS implementation timeline gives structure to the project. It helps you decide what should happen first, what can happen in parallel, and what must be completed before launch. A timeline also reduces last-minute pressure.
When a POS system launch is rushed, teams are more likely to skip data cleanup, staff training, payment testing, or backup planning.
The timeline depends on business complexity. A small business POS setup with one location, simple inventory, and limited integrations may be completed quickly.
A retail POS implementation with thousands of items, customer data migration, accounting integration, ecommerce integration, and multiple checkout stations needs more planning. A restaurant POS implementation may require menu testing, kitchen routing, printer setup, tip settings, table layouts, and server training.
Build the timeline around milestones. Common milestones include business workflow review, software selection, payment account setup, hardware ordering, data cleanup, product catalog setup, POS hardware setup, integration configuration, employee permissions, staff training, test transactions, reporting review, go-live planning, launch support, and post-launch review.
A good POS deployment checklist should also include dependencies. For example, you cannot fully test barcode scanning until product data and barcode values are loaded. You cannot test settlement reporting until payment processing is connected.
You cannot train employees effectively until the system reflects the real menu, product catalog, tax settings, discounts, and receipt layout.
| Implementation Step | What to Do | Why It Matters | Practical Tip |
| Review workflows | Map sales, returns, payments, inventory, and reporting | Prevents setup gaps | Document normal and exception scenarios |
| Clean data | Prepare products, menus, customers, and inventory | Reduces import errors | Remove duplicates before migration |
| Order hardware | Confirm terminals, printers, scanners, drawers, and readers | Avoids launch delays | Check compatibility before purchase |
| Configure payments | Connect merchant account, gateway, card readers, and payment types | Ensures checkout works | Test cards, refunds, tips, and receipts |
| Set permissions | Create user roles and access controls | Reduces errors and misuse | Give employees only needed access |
| Train staff | Practice real checkout scenarios | Builds confidence | Use role-based training sessions |
| Test system | Run transactions, reports, inventory updates, and integrations | Finds issues before launch | Keep a written issue log |
| Launch support | Schedule help during go-live | Speeds troubleshooting | Avoid launching during peak traffic |
| Review results | Check reports, reconciliation, speed, and adoption | Improves performance | Review daily during the first phase |
Implementation Timeline by Business Size
A simple implementation may have a short timeline, but even simple setups need structure. A solo service provider may only need to configure services, payment methods, receipts, tax settings, and customer records.
A small retail shop may need product imports, barcode scanner setup, receipt printer setup, cash drawer testing, and staff training. A restaurant may need menu configuration, modifiers, floor plans, kitchen printers, tip settings, and server workflows.
For multi-location businesses, the timeline should include pilot testing. A pilot lets one location test the POS setup before the full rollout.
This can reveal issues with inventory migration, reporting dashboards, local tax settings, employee permissions, and payment reconciliation. After the pilot, update the POS rollout checklist before expanding to other locations.
Do not schedule launch based only on when the software account is active. Schedule launch based on readiness. Readiness means data is clean, hardware works, payments are tested, employees are trained, integrations are connected, reports are reviewed, and a troubleshooting process exists.
Prepare Product, Menu, Customer, and Inventory Data
Data preparation is one of the most important parts of POS system setup. Many POS implementation problems begin with messy data, incomplete product lists, duplicate customer records, incorrect tax categories, outdated inventory counts, or inconsistent naming conventions.
If bad data goes into the system, bad information will appear in checkout, reporting, inventory, and reconciliation.
Product, menu, customer, and inventory data should be reviewed before import. This includes item names, descriptions, categories, prices, cost, SKUs, barcodes, variants, modifiers, tax status, discounts, gift cards, loyalty settings, vendor information, reorder points, and location-specific inventory.
For restaurants, menu data may include categories, modifiers, preparation notes, kitchen routing, course timing, happy hour rules, and item availability.
Data preparation also affects staff training. Employees learn faster when the system reflects real products, real prices, real service categories, and real workflows. If the training environment is filled with test items or incomplete menus, employees may not be ready for actual customer interactions.
For businesses that rely heavily on inventory, POS data quality has a direct impact on purchasing and stock control. Modern POS systems often update inventory after sales, which can help businesses track stock levels and avoid stockouts when the setup is accurate.
For more background, this guide to using POS systems for inventory management explains how inventory tracking connects to daily sales activity.
Product Catalog Setup
Product catalog setup should be organized before anything is imported. Create a standard format for item names, categories, SKUs, barcodes, prices, costs, variants, and tax status. For example, a clothing retailer may need size and color variants.
A grocery store may need weighted items, barcode labels, and taxable or non-taxable categories. A repair shop may need parts, labor items, service packages, and deposits.
Clean the product list before migration. Remove discontinued items, duplicate SKUs, outdated prices, and inconsistent category names. If you have multiple locations, confirm which products are available at each location and whether pricing differs by store.
Also decide how discounts, bundles, gift cards, and loyalty rewards should be handled. A product catalog is not only a list of items. It is the foundation for accurate checkout, reporting, tax calculation, inventory tracking, and customer purchase history.
Menu Configuration
Restaurant POS implementation requires careful menu configuration. Menus are more complex than item lists because they often include modifiers, substitutions, add-ons, timed availability, kitchen instructions, coursing, seat numbers, tip prompts, and order routing.
A burger item, for example, may need cooking temperature, cheese options, side choices, allergy notes, and upcharge rules.
Test menu flow from the employee’s point of view. Can servers find items quickly? Are modifiers required where needed? Are optional modifiers easy to skip? Are kitchen tickets clear? Do bar items route to the right printer or display? Are taxes and service charges calculated correctly?
Also review menu changes. Restaurants often update prices, seasonal items, specials, and modifiers. Decide who can edit menu items and how changes are approved. Strong employee permissions prevent accidental edits during busy shifts.
Inventory Data Migration
Inventory migration requires more than uploading a spreadsheet. Before importing inventory, complete a physical count or cycle count where possible. Compare the count to your old system and investigate large differences. Then decide whether the new POS system should launch with current quantity on hand, reorder points, vendor data, cost data, and location-specific stock.
For retailers and ecommerce sellers, inventory migration should include product variants and online stock availability. If the POS system connects to ecommerce, test whether an in-store sale reduces online inventory and whether an online sale reduces store inventory. If that sync fails, customers may buy items that are no longer available.
For restaurants, inventory may focus on ingredients, recipes, prepared items, or category-level tracking. Decide how detailed the system needs to be. Not every restaurant needs ingredient-level tracking at launch, but all restaurants should understand how menu sales affect purchasing and waste review.
Customer Data Import
Customer data migration can support loyalty programs, purchase history, email receipts, service notes, store credit, and customer segmentation. Before importing customer records, remove duplicates, outdated contact details, and incomplete records where appropriate. Also confirm how customer consent and communication preferences should be handled.
Customer records may include names, phone numbers, email addresses, addresses, birthdays, loyalty points, store credit, notes, and transaction history. Import only the data you need and can manage responsibly. More data is not always better if it creates clutter or privacy risk.
Access controls are important here. Not every employee needs full customer data access. A cashier may need to look up loyalty status, while a manager may need broader access for refunds, account corrections, or customer service issues.
Set Up POS Hardware, Terminals, and Accessories
POS hardware setup turns the implementation plan into a working checkout environment. This step includes installing terminals, tablets, stands, card readers, receipt printers, barcode scanners, cash drawers, customer displays, routers, kitchen printers, label printers, and any other devices needed for daily operations.
A POS installation checklist should document each device, its location, connection type, power source, network access, and testing status.
Hardware should be installed where staff can use it comfortably and customers can interact with it easily. A terminal should not block the counter. A card reader should allow customers to insert, tap, or swipe without confusion.
A receipt printer should be close enough for staff to reach quickly. A cash drawer should be secure and stable. Barcode scanners should be positioned for efficient scanning.
Network reliability matters. Cloud POS systems rely on internet access for many functions, so test Wi-Fi strength, wired connections, router placement, and backup internet options.
Even systems with offline mode usually have limits, especially for payment processing or data sync. Document what employees should do if the internet fails, a printer stops working, or a card reader loses connection.
For restaurants, hardware setup should include kitchen routing. Kitchen printers and kitchen display screens must receive orders correctly by station. Bar orders should go to the bar. Hot food should go to the kitchen. Prep notes should be readable. Modifiers should print clearly. If routing is wrong, order accuracy can suffer quickly.
Receipt Printer Setup
Receipt printer setup should include connection testing, receipt formatting, logo placement if used, tax display, payment type display, tip lines, refund details, customer copy settings, and drawer kick settings. Test both printed and digital receipts if your POS system supports email or text receipts.
Place printers away from spills, heat, and heavy traffic. For high-volume environments, keep extra paper rolls nearby and train staff to replace paper quickly. If the printer connects through a local network, label the printer and document the IP address or connection details for support.
Receipts are more than proof of purchase. They affect returns, customer service, payment disputes, and end-of-day review. Confirm that receipts show the right business information, transaction details, tax amounts, payment status, and return policy if included.
Barcode Scanner Setup
Barcode scanner setup is critical for retailers with many SKUs. Test scanners with different product types, labels, packaging materials, and angles. Confirm that each barcode pulls up the correct item, price, variant, and tax status. Also test items with damaged labels or small barcode placement.
If you print your own labels, test label size, adhesive, readability, and placement. Poor barcode labels can slow checkout even when the POS software is working correctly. Train staff on what to do when a barcode does not scan, such as searching by SKU, product name, or category.
For inventory receiving, test whether the scanner works in purchase orders, stock counts, transfers, and adjustments. A scanner that works at checkout but not in inventory workflows may create extra manual work for managers.
Card Reader and Customer Display Setup
Card readers should be tested for chip cards, tap-to-pay, swipe fallback if supported, debit card payments, credit card processing, contactless payments, mobile payments, and digital wallets. Confirm that the payment prompts are clear to customers. Also test tipping, signature capture, PIN entry, and receipt selection if those features apply.
Customer displays should show the right items, prices, taxes, discounts, and totals. This helps customers catch mistakes before payment. In fast-paced environments, a clear customer display can reduce questions and improve checkout confidence.
Clean cable management is also important. Loose cables can cause device disconnects, safety issues, and clutter. Label cables and ports when possible so staff can troubleshoot faster.
Configure Payment Processing and Security Settings
Payment processing and security settings are central to POS system implementation. A POS system may look ready because products and hardware are set up, but the business is not ready to launch until payments, refunds, settlements, receipts, and security controls have been tested.
This part of the POS deployment checklist should be handled carefully because it affects revenue, customer trust, and compliance responsibilities.
Payment configuration may include merchant account connection, payment gateway setup, terminal pairing, card reader activation, debit settings, tip settings, refund permissions, void rules, batch settlement, online payments, stored payment methods, gift cards, and reconciliation reports. Businesses should confirm which payment methods they accept at each location and channel.
Security configuration should include user roles, access controls, password rules, multi-factor authentication where available, device security, software updates, network protections, and payment security settings.
PCI guidance emphasizes protecting payment card data, and the PCI Security Standards Council provides educational resources for small merchants on safe payment practices. The FTC’s business guidance also highlights the importance of security practices such as authentication, access control, and secure handling of data.
A strong setup does not depend only on the POS provider. Business owners and managers also need internal rules. Decide who can issue refunds, who can approve discounts, who can access reports, who can edit products, who can view customer data, and who can change payment settings.
Merchant Account Connection
The merchant account connection links your POS system to card payment acceptance and settlement. During setup, confirm business information, bank account details, payment types, processing limits if applicable, funding timelines, chargeback notification process, and reporting access. Any error in account setup can delay deposits or complicate reconciliation.
Test settlement reporting before launch. A transaction may appear successful at the terminal, but managers still need to confirm how it appears in batch reports, payment reports, deposit reports, and accounting records. If your POS system separates in-person and online payments, confirm how each channel is reported.
Also review refund and void rules. Staff should know the difference between voiding a same-day transaction and refunding a settled transaction. Managers should know where refund reports appear and how to reconcile them.
Payment Gateway Setup
A payment gateway setup is especially important for businesses accepting online payments, invoices, ecommerce orders, deposits, or card-not-present transactions. The gateway should connect correctly with your POS software, ecommerce site, customer records, and reporting dashboard.
Test the full online payment flow. Confirm that orders are created correctly, taxes are calculated correctly, payment status updates properly, receipts are sent, and inventory adjusts if applicable. If the payment gateway supports digital wallets or stored customer payment methods, confirm the setup matches your policies and provider requirements.
For ecommerce sellers, the payment gateway must work with both checkout and back-office reconciliation. A sale should not only process successfully; it should also flow into reports in a way the business can understand.
Employee Permissions and Access Controls
Employee permissions should be configured before staff training. Create roles for cashiers, servers, shift leads, managers, inventory staff, bookkeepers, and administrators. Then assign permissions based on responsibility.
A cashier may process sales but not edit prices. A shift lead may approve discounts but not change tax settings. A bookkeeper may view reports but not process refunds.
Access controls reduce accidental changes and support accountability. They also help protect sensitive business and customer data. The FTC’s data security guidance includes practical topics such as authentication, access control, and secure data management for businesses.
Review permissions after launch. Sometimes a role is too restrictive, slowing work unnecessarily. Other times, too many employees have manager-level access. The goal is balance: enough access to do the job, not so much that errors become easy.
PCI Compliance Settings
PCI compliance settings depend on how your business accepts, processes, stores, or transmits payment card data.
In many modern POS systems, card data is handled through validated payment devices and secure processing tools, but the business still has responsibilities for device security, access controls, network practices, employee training, and provider documentation.
Confirm whether your provider offers PCI guidance, required questionnaires, scanning requirements, or compliance tools. Do not assume that using a modern POS system automatically completes every responsibility. Payment security is a shared effort between technology, provider processes, and business practices.
Also train staff to protect payment devices. Employees should report tampering, damaged card readers, unusual prompts, or suspicious device behavior. Device checks can be added to opening or closing routines.
Connect Integrations for Accounting, Ecommerce, and Reporting
Integrations can make a POS system more valuable, but they can also create implementation problems when they are not planned carefully. Accounting integration, ecommerce integration, inventory integration, loyalty programs, gift cards, payroll tools, delivery platforms, reporting dashboards, and customer management systems all need review before launch.
An integrated POS system can reduce duplicate entry, improve reporting, and connect checkout activity with other business tools. But every integration has rules. Data may sync one way or two ways.
Updates may happen instantly, on a schedule, or only after manual approval. Some fields may not transfer exactly. Tax categories, discounts, refunds, tips, service charges, and gift cards may need special mapping.
Before connecting integrations, define the source of truth. For example, should the POS system control inventory, or should ecommerce control inventory? Should accounting receive daily summaries or individual transactions? Should customer profiles be created in the POS, ecommerce platform, or both? Without these decisions, systems may overwrite each other or create duplicate records.
Integrated POS systems often support inventory, customer relationship management, reporting, and employee management in addition to transaction processing. This background guide on integrated POS system benefits may help decision-makers think through integration value and trade-offs.
Ecommerce Integration
Ecommerce integration connects online sales with POS activity. This is important for businesses that sell in-store and online, offer pickup, manage shipping, or use online payments. A good integration should keep products, prices, inventory, orders, customer data, and payment status aligned.
Test common scenarios before launch. Place an online order and confirm whether it appears in the POS. Sell the same item in-store and confirm whether online inventory updates.
Process an online return and confirm whether inventory, payment, and reports update correctly. Test pickup orders, shipping orders, discounts, taxes, gift cards, and customer profiles.
Inventory sync deserves special attention. If inventory updates slowly or incorrectly, customers may buy unavailable items. Decide how safety stock, overselling rules, backorders, and location-based inventory should work.
Accounting Software Integration
Accounting software integration can save time, but it must be mapped carefully. Confirm how sales, taxes, tips, refunds, discounts, gift cards, fees, deposits, cash payments, card payments, and payouts transfer. A daily summary may work for some businesses, while others need more detailed records.
Review chart of accounts mapping with the person responsible for bookkeeping. Incorrect mapping can create messy financial reports. For example, tips should not be treated the same as product revenue, and gift card sales may need different treatment than redeemed gift cards.
Also confirm reconciliation timing. Sales may happen today, card deposits may arrive later, and fees may be deducted separately. Your POS reports, payment processor reports, and accounting records should be reviewed together so managers understand the full flow.
Reporting Dashboard Setup
Reporting dashboard setup should happen before launch, not after. Decide which reports managers need daily, weekly, and monthly. Common reports include gross sales, net sales, taxes, refunds, discounts, tips, payment types, employee sales, inventory movement, low-stock items, location performance, customer activity, and reconciliation.
Customize reports where possible. A restaurant manager may need sales by menu category, server, hour, and payment type. A retailer may need sales by SKU, vendor, margin, and location. A service business may need revenue by employee, appointment type, and customer segment.
Managers should test reports with sample transactions. Run a sale, refund, discount, tip, gift card transaction, and tax-exempt sale if applicable. Then check whether the reporting dashboard displays those events correctly.
Train Staff Before Going Live
Staff training is one of the most important parts of the POS training checklist. Even a well-configured POS system can fail during launch if employees do not know how to use it. Training should be practical, role-based, and focused on real checkout scenarios. Employees need more than a brief demonstration. They need hands-on practice.
Training should cover normal transactions and exceptions. Normal transactions include adding items, scanning products, taking payments, printing receipts, sending digital receipts, applying taxes, and closing orders.
Exceptions include discounts, refunds, exchanges, voids, gift cards, loyalty rewards, split payments, tips, no-sale drawer opens, item lookup, and customer profile updates.
Training should also include security and accountability. Employees should understand why they have individual logins, why sharing passwords is not acceptable, why manager approvals matter, and how to report hardware or payment issues.
Managers should be trained separately on reports, permissions, refunds, reconciliation, inventory adjustments, and troubleshooting.
Training needs vary by business type. Retail staff may need barcode scanner practice, return workflows, inventory lookup, and customer display review.
Restaurant staff may need table orders, modifiers, kitchen tickets, split checks, tip adjustments, and shift closeout. Service providers may need appointment checkout, deposits, invoices, customer notes, and partial payments.
Staff Training Plan
A staff training plan should define who needs training, what they need to learn, who will train them, and how readiness will be confirmed. Start with roles. Cashiers, servers, managers, inventory staff, bookkeepers, and administrators do not all need the same training.
Use realistic practice scenarios. For example, ask a cashier to scan three items, apply a discount, accept a contactless payment, print a receipt, and process a return.
Ask a restaurant server to open a table, add modifiers, split a check, send items to the kitchen, accept payment, and close the check. Ask a manager to issue a refund, review sales reports, adjust inventory, and approve a discount.
Keep training materials short and accessible. Use job aids, screenshots, quick reference cards, or short videos if helpful. Employees should know where to find help during launch.
Manager and Administrator Training
Managers need deeper training than frontline staff. They should understand configuration settings, permissions, reporting, reconciliation, inventory adjustments, menu updates, product edits, employee roles, and troubleshooting. They should also know when to contact provider support and what information to provide.
Administrator access should be limited. Too many administrators can create inconsistent settings and accidental changes. Decide who can edit tax settings, payment settings, product imports, integrations, and user roles.
Managers should also be trained to coach employees during launch. The first few days may include mistakes, questions, and slow transactions. A prepared manager can correct problems calmly and keep the checkout moving.
Test the POS System Before Launch
Testing is the step that separates a hopeful launch from a controlled launch. A POS system may appear ready after setup, but testing reveals whether the software, hardware, payments, inventory, reports, permissions, and integrations actually work together. This part of the POS system implementation checklist should be documented carefully.
Test transactions should cover both ordinary and unusual scenarios. Run a standard sale, cash sale, card sale, debit transaction, contactless payment, mobile wallet payment, discount, refund, exchange, void, tip, split payment, gift card sale, gift card redemption, loyalty reward, tax-exempt sale if applicable, and online order if applicable. Then check receipts, inventory changes, customer records, payment reports, and accounting sync.
Testing should also include hardware. Confirm that receipt printers print correctly, cash drawers open when expected, barcode scanners pull up the right items, card readers connect reliably, customer displays show accurate totals, and kitchen printers route orders correctly. If you have multiple terminals, test each one.
Do not test only when the store or restaurant is quiet. Simulate busy conditions. Have several employees use the system at once. This can reveal Wi-Fi issues, printer delays, login confusion, duplicate order problems, or slow checkout steps.
Test Transactions
Test transactions should be planned, not random. Create a testing checklist with specific scenarios and expected outcomes. For each scenario, record whether it passed, failed, or needs review. Include notes about what happened and who is responsible for fixing it.
A retailer might test a barcode sale, manual item search, return without receipt, exchange, loyalty lookup, discount approval, cash payment, card payment, and end-of-day close.
A restaurant might test dine-in orders, modifiers, kitchen tickets, split checks, tips, voids, refunds, bar tabs, and online orders. A service business might test invoice payment, deposit, partial payment, tip, receipt, and customer record update.
After each test, check the reporting dashboard. A sale that looks correct at checkout may still flow incorrectly into reports. Verify sales totals, taxes, payment types, refunds, discounts, tips, and inventory updates.
Payment Security Testing
Payment security testing should confirm that payment devices and workflows operate safely and correctly. Test chip, tap, swipe fallback if supported, debit, credit, digital wallets, tips, refunds, voids, and receipts. Confirm that employees cannot access sensitive payment data they do not need.
Also inspect physical devices. Card readers should be mounted or placed securely, cables should be protected, and staff should know how to identify unusual device behavior. If your provider offers device management tools, confirm that devices appear correctly in the account.
Review user permissions during testing. A cashier should not be able to change payment settings. A server should not be able to edit tax rates. A manager should be able to approve required actions without needing full administrator access.
Inventory and Reporting Testing
Inventory and reporting testing confirms whether transactions create the right operational records. Sell an item and confirm inventory decreases. Return an item and confirm inventory increases if that is your intended workflow. Adjust stock and confirm the change appears in inventory reports.
For ecommerce integration, test whether online and in-store sales update the same inventory count. For multi-location businesses, test location-specific sales and transfers. A sale at one location should not reduce inventory at the wrong location.
Reporting tests should include daily sales, payment totals, tax reports, discounts, refunds, employee activity, and reconciliation. If accounting integration is active, confirm how test data appears there as well.
Create a Go-Live Plan and Troubleshooting Process
A go-live plan explains exactly how the business will launch the POS system. It should define the launch date, launch time, staffing plan, support contacts, backup procedures, communication process, and success criteria. This section of the POS rollout checklist helps reduce confusion when the new system becomes the live checkout environment.
Do not launch without deciding what happens to the old system. Will it be turned off immediately? Will it remain available for reference? How will final sales, inventory, customer data, open orders, gift cards, and reports be handled? Businesses should also decide how to handle transactions that occur during the transition window.
Launch support is important. Managers should be present during early use. Employees should know who to ask for help. Support contacts should be easy to find. If your provider offers launch support, schedule it in advance. If you have IT support, make sure they know the launch timeline and hardware layout.
A troubleshooting process should cover common issues such as card reader failure, printer problems, barcode scanner errors, cash drawer issues, login problems, wrong prices, missing products, failed online orders, inventory sync delays, and internet outages. The goal is not to prevent every issue. The goal is to respond quickly and consistently.
Launch Day Checklist
A launch day checklist should be completed before opening or before the first live transaction. Confirm that all terminals are powered on, logged in, connected to the network, and synced. Check receipt printers, cash drawers, barcode scanners, card readers, customer displays, and kitchen printers. Make sure paper rolls, labels, chargers, and backup devices are available.
Verify product prices, menu items, tax settings, discounts, gift cards, loyalty programs, employee logins, and manager approvals. Confirm that payment processing is active and that staff know how to handle declined cards, split payments, refunds, and receipt requests.
Also prepare for communication. Employees should know whether the old POS system is still available, whether any workflows have changed, and who is responsible for troubleshooting. Managers should monitor checkout speed, customer questions, employee confidence, and early transaction reports.
Troubleshooting Process
A troubleshooting process should be simple enough for employees to follow during a busy shift. Start with common issues.
If a card reader disconnects, what should staff check first? If a receipt printer stops printing, where is the backup printer or paper? If a barcode does not scan, how should staff search for the item? If the internet fails, what offline or backup process is available?
Create escalation levels. Frontline employees can handle basic steps. Shift leads can approve refunds, discounts, and device restarts. Managers can contact provider support, adjust settings, or make operational decisions. Administrators can handle configuration changes.
Document support contacts and account information securely. Staff should not need to search emails or personal phones to find help during launch.
Backup Process
A backup process protects the business when something does not work as expected. Depending on your setup, backup procedures may include offline mode, backup card reader, mobile hotspot, manual receipts, cash-only instructions, printed price lists, paper order pads, or delayed inventory adjustment processes.
Backups should be tested before launch. If you plan to use a hotspot, test it with the POS devices. If you plan to use offline mode, confirm its limits. If restaurants will use paper tickets during a kitchen printer outage, make sure staff know where paper pads are located.
Backups are not a substitute for a working POS system, but they help maintain service while issues are resolved.
Review Performance After Implementation
POS system implementation does not end at launch. The post-launch review is where managers confirm whether the system is working as intended and where improvements are needed. A POS system may be technically live but still require adjustments to reports, permissions, menu layout, product categories, inventory settings, or training.
Review performance daily during the first phase after launch. Look at sales reports, payment reconciliation, refunds, discounts, tax totals, inventory updates, employee activity, checkout speed, and customer feedback.
Ask staff what is confusing or slow. Ask managers whether reports provide the information they need. Check whether accounting and ecommerce integrations are syncing correctly.
Post-launch review is especially important for businesses with multiple locations. One location may discover a pricing issue, permission gap, or training problem that applies to others. Use those findings to update the POS deployment checklist before expanding the rollout.
Also review support tickets and issue logs. Look for patterns. If many employees struggle with the same task, training may need improvement. If one device keeps disconnecting, hardware or network placement may need adjustment. If inventory counts are off, data migration or workflow rules may need review.
Sales Reports and Reconciliation
Sales reports and reconciliation should be checked closely after launch. Compare POS sales totals, payment processor reports, cash drawer counts, refunds, tips, taxes, discounts, and bank deposits. Differences may occur because of timing, fees, unsettled transactions, refunds, or configuration issues.
Managers should understand which report is used for daily closeout and which report is used for accounting. A POS sales report may not match a deposit report exactly because card deposits can settle later. That does not always mean something is wrong, but the team should understand why differences occur.
Review cash handling as well. Confirm that cash drawers open only when expected, no-sale events are tracked, and cash counts are recorded consistently.
Inventory Accuracy
Inventory accuracy should be reviewed after the first few sales cycles. Compare expected quantities with actual counts for high-volume items. Look for negative inventory, duplicate items, missing variants, incorrect units, or online sync issues.
Retailers should check whether returns, exchanges, damaged items, transfers, and purchase orders update inventory correctly. Restaurants should check whether menu sales, ingredient tracking, waste, and comps are handled according to the chosen workflow. Ecommerce sellers should confirm that online and in-store stock remain aligned.
Inventory problems often come from setup decisions, not software failure. Category structure, units of measure, variants, and sync rules all affect accuracy.
Employee Adoption and Customer Experience
Employee adoption is a practical measure of implementation success. If employees avoid certain features, write workarounds on paper, share logins, or call managers for routine tasks, the POS system setup may need adjustment. Training may also need reinforcement.
Customer experience should also be reviewed. Are checkout lines moving faster or slower? Are receipts clear? Are customers confused by payment prompts? Are staff able to answer questions? Are returns and exchanges smooth?
Small improvements can make a big difference. Moving a popular item button, simplifying modifiers, adjusting receipt settings, or changing permission prompts can improve speed and confidence.
Common POS Implementation Mistakes to Avoid
Many POS implementation mistakes are avoidable with planning. One common mistake is rushing setup because the system appears easy to use. Modern POS software may be user-friendly, but the business still needs clean data, accurate tax settings, tested payments, trained staff, and reliable hardware. A fast setup is not the same as a complete setup.
Another mistake is skipping data cleanup. Importing duplicate products, outdated prices, incorrect barcodes, old customers, or inaccurate inventory creates problems immediately. Staff may ring up the wrong item, customers may be charged incorrectly, and reports may be unreliable.
Weak staff training is another major issue. Employees need hands-on practice with real scenarios. A short overview is rarely enough, especially for refunds, discounts, split payments, tips, gift cards, loyalty programs, and closing procedures.
Poor integration planning can also create problems. If ecommerce, accounting, inventory, or reporting integrations are connected without mapping rules, data may duplicate, sync incorrectly, or appear in the wrong accounts. Decide what each system controls before launch.
Unclear permissions create risk. If too many people have administrator access, settings can change accidentally. If permissions are too strict, employees may be unable to serve customers efficiently. Review access by role and adjust after launch.
Finally, some businesses fail to create a backup process. Internet outages, printer issues, device problems, and payment delays can happen. A simple backup plan helps staff keep operating while problems are resolved.
POS System Implementation Checklist for Before, During, and After Launch
A checklist-style process helps business owners and managers confirm readiness at each phase. The goal is not to create paperwork for its own sake. The goal is to make sure the POS implementation plan is complete enough to support real sales, real customers, real employees, and real reporting.
Before launch, focus on planning, data, configuration, hardware, payments, integrations, and training. During launch, focus on readiness, support, transaction monitoring, and issue response. After launch, focus on reconciliation, reporting accuracy, staff adoption, inventory accuracy, and workflow improvement.
This checklist can be adapted for retail POS implementation, restaurant POS implementation, small business POS setup, ecommerce operations, service providers, and multi-location businesses.
Before Launch
- Review business workflows for sales, returns, refunds, discounts, tips, inventory, and reporting.
- Choose POS software that supports your business model and checkout needs.
- Confirm POS hardware compatibility before ordering devices.
- Clean product, menu, customer, and inventory data.
- Configure tax settings, discounts, gift cards, loyalty programs, and receipts.
- Set up employee permissions and user roles.
- Connect merchant account and payment gateway.
- Test credit card processing, debit card payments, contactless payments, mobile payments, and digital wallets.
- Connect ecommerce, accounting, inventory, loyalty, or reporting integrations as needed.
- Train staff with role-based practice scenarios.
- Create a troubleshooting process and backup plan.
During Launch
- Confirm all terminals, card readers, printers, scanners, and cash drawers work.
- Verify employee logins and manager approvals.
- Monitor checkout speed and payment success.
- Check receipts for accuracy.
- Keep managers available for support.
- Track issues in a shared log.
- Review sales and payment reports during the launch period.
- Communicate quickly if a temporary workaround is needed.
After Launch
- Reconcile POS sales with payment reports and deposits.
- Review tax totals, refunds, discounts, tips, and cash counts.
- Check inventory updates and ecommerce sync.
- Review employee permissions and adjust if needed.
- Gather staff feedback.
- Check customer experience at checkout.
- Fix recurring issues.
- Schedule follow-up training where needed.
- Review reporting dashboards with managers.
- Update the POS implementation checklist for future locations or system changes.
FAQs
What is a POS system implementation checklist?
A POS system implementation checklist is a structured list of tasks used to plan, configure, test, and launch a point of sale system.
It usually covers business workflow review, POS software implementation, POS hardware setup, payment processing, data migration, employee permissions, integrations, staff training, testing, launch support, and post-launch review.
The checklist helps make sure important details are not missed before the system is used for real transactions.
How long does POS system implementation usually take?
The timeline depends on the size and complexity of the business. A simple small business POS setup with one location, limited products, and basic payment processing may be completed quickly.
A larger retail POS implementation, restaurant POS implementation, ecommerce integration, or multi-location rollout may require more time for data cleanup, hardware installation, staff training, integration testing, and reporting review. The best timeline is based on readiness, not speed.
What should businesses prepare before setting up a POS system?
Businesses should prepare product lists, menus, prices, SKUs, barcodes, inventory counts, customer data, employee roles, tax settings, discounts, gift cards, loyalty programs, receipt details, and reporting needs.
They should also review payment processing requirements, merchant account details, payment gateway setup, hardware needs, internet reliability, and integration requirements. Clean data and clear workflows make POS system setup much easier.
What POS hardware is usually needed?
Common POS hardware includes a terminal or tablet, card reader, receipt printer, cash drawer, barcode scanner, customer display, router, and sometimes a label printer.
Restaurants may also need kitchen printers, kitchen display screens, handheld ordering devices, and guest-facing payment devices. The exact hardware depends on business type, checkout volume, physical layout, payment methods, and POS software compatibility.
Why is staff training important before launch?
Staff training is important because employees are the people using the POS system during real customer interactions. If they are not prepared, checkout can slow down, refunds may be handled incorrectly, discounts may require unnecessary manager help, and reporting may suffer from transaction errors.
A strong POS training checklist should include normal sales, exceptions, payments, receipts, refunds, permissions, security practices, and troubleshooting.
How should businesses test a POS system before going live?
Businesses should test real transaction scenarios before launch. This includes cash sales, card payments, debit card payments, contactless payments, mobile payments, refunds, voids, discounts, gift cards, loyalty rewards, tips, split payments, receipts, inventory updates, reports, ecommerce orders, and accounting sync.
Each terminal, card reader, barcode scanner, receipt printer, cash drawer, and customer display should also be tested.
What common POS implementation mistakes should be avoided?
Common mistakes include rushing setup, importing messy data, skipping payment testing, ignoring security settings, giving too many employees administrator access, failing to train staff, not testing integrations, forgetting backup procedures, and launching during a high-pressure sales period.
Another mistake is assuming that software activation means the business is ready. A complete POS deployment checklist should confirm operational readiness.
What should businesses review after POS launch?
After launch, businesses should review sales reports, payment reconciliation, cash drawer counts, refunds, taxes, discounts, tips, inventory accuracy, ecommerce sync, accounting integration, checkout speed, employee adoption, and customer experience.
Managers should also review support issues and staff feedback. Post-launch monitoring helps correct problems early and improve the system over time.
Conclusion
A POS system implementation checklist gives business owners, managers, and decision-makers a practical path from planning to launch.
It helps organize the many details involved in POS system implementation, including business workflow review, POS software selection, POS hardware setup, payment processing, data migration, employee permissions, staff training, testing, troubleshooting, and post-launch monitoring.
The most successful implementations are not rushed. They begin with a clear understanding of the business model, sales volume, inventory complexity, payment methods, staff roles, integrations, and customer checkout workflow.
They also include careful data preparation, realistic testing, strong access controls, and a launch plan that supports employees when the system goes live.
Whether you are handling retail POS implementation, restaurant POS implementation, ecommerce integration, small business POS setup, or a multi-location POS rollout, the same principle applies: the system should be ready before customers depend on it.
A thoughtful POS setup checklist reduces confusion, improves checkout reliability, supports accurate reporting, and gives your team more confidence.
After launch, continue reviewing performance. Check sales reports, reconciliation, inventory accuracy, employee adoption, and customer experience. Use what you learn to refine settings, improve training, and strengthen daily operations.
A POS system is not just a tool for accepting payments. When implemented well, it becomes a reliable foundation for smoother transactions, better visibility, and more organized business management.